Showing posts with label organic farming. Show all posts

Saturday, 3 January 2015

Cancer and Vegetables

I just came across this article about 6-thiodG(Click me to read about it) and how it is a potential weapon against cancer. Cancer is something that can happen due to mutations, passive smoking and therefore due to almost no fault of yours. Although there is no guarantee of preventing cancer even if you follow a healthy diet and not drink alcohol or smoke. But as the saying goes, Prevention is better than a Cure, hence you should do your best to protect yourself from this disease.

As you all know that my aim is to produce low cost organic vegetables, at home, on a terrace, using recyclable items and therefore make it available to almost all.

Before I go on, do take a look at the following pages, they tell you about how certain vegetables can help prevent cancer. The most common vegetables/fruits are - Tomatoes, Strawberries, Garlic, Beans, Cabbages, Cauliflower, Green leafy vegetable(Spinach, Radish leaves)


Now, you know what you should eat, you should also know that you should eat the right thing. Pesticides are also harmful and certain pesticides are also know to cause cancer. So, even if you are eating the right vegetable, it doesn't necessarily mean that you are eating the right thing. Hence, better be careful and grow your own veggies, this way you know that whatever you are eating, it is true and absolutely unadulterated.

My blog has "How to Grow" instructions  on some vegetables, and I will be updating my blog with the rest.


I really hope that you could prevent cancer and may you live a healthy life.

Monday, 29 December 2014

Growing Organic Bhutan Chilies

Introduction
Name : Bhutan Chilly
Sowing season : Anytime - It is not a seasonal plant
Harvesting Season : It gives chillies throughout the year


Health Benefits
Check out this website : Click Me


1. Lowers blood sugar level

2. Improves heart health, boosts circulation, thins blood and helps protect against stroke

3. Provides pain relief and reduces inflammation

4. Acts as a therapeutic and relaxant

5. Helps clear congestion

6. Limits spreading of prostrate cancer

7. lowers risk of stomach cancer

8. Help to burn fat


How to Plant
  • Planting Time : Beginning of Winter season (November, December)
  • Note : This is how I planted them. But you should remember that it is not a seasonal vegetable and you can plant it anytime. it gives chillies throughout the year.
  • Steps :

Preparation of Sapling ( in October)

  1. Take a pot. Make a hole in it.
  2. Mix 3 parts of soil, 1 part of sand and 1 part of vermi-compost.
  3. Fill the packet with the above mixture.
  4. Put a few chilly seeds in each pot.
  5. Put some soil on it.
  6. DONT pour water on it. Just sprinkle some water on it.
  7. When the sapling has 4-6 leaves then prepare to plant it in a larger sack.

Planting of Sapling ( in November or December)

  1. Take a 5kg or 10kg empty plastic sack. Make a few holes at the bottom of the sack.
  2. Take three parts of soil, one part of sand and one part of half/fully decayed kitchen waste.
  3. Mix them well.
  4. Fill the sack with the above mixture.
  5. Now transfer the sapling in the sack. (1 sapling in a 5kg packet. 2 saplings in a 10kg packet)


    Bhutan Chilies of my Terrace Garden

    Sunday, 28 December 2014

    Growing Organic Tomatoes


    Introduction
    Name : Tomato
    Indian name : Tamatar
    Other names : Scientifically known as - Solanum lycopersicum

    Health Benefits  

    1. Helps in overcoming eye irritation.

    2. Helps in healing sunburns.

    3. Restores Vitality For Persistent Fatigue.

    4. Restores the Health of the Liver.

    5. Leaves of tomatoes acts as Antibiotics.

    6. Contains Potassium, vitamin B6, niacin, vitamin K, chromium and biotin.


    How to Plant

    • Planting Time : Beginning of Winter season (November, December)
    • Steps :

    Preparation of Sapling ( in October)

    1. Take a 1 liter empty and cleaned milk packet.
    2. Mix 3 parts of soil, 1 part of sand and 1 part of vermi-compost.
    3. Fill the packet with the above mixture.
    4. Put 1 tomato seed in each packet.
    5. Put some soil on it.
    6. DONT pour water on it. Just sprinkle some water on it.


      Planting of Sapling ( in November or December)

      1. Take a 5kg or 10kg empty plastic sack.
      2. Take three parts of soil, one part of sand and one part of half/fully decayed kitchen waste.
      3. Mix them well.
      4. Fill the sack with the above mixture.
      5. Now transfer the sapling in the sack. (1 sapling in a 5kg packet. 2 saplings in a 10kg packet)

      This is how you should plant the sapling in the sack.


      Tomatoes of my Terrace Garden


      Wednesday, 23 July 2014

      How to Preserve seeds of Okra / Lady's fingers?

      Check out my video demonstration -


      I had planted okra in the end of winter season
      The entire summer I got tasty, healthy & organic okra from it.
      Now, it is time to collect the seeds from it - for sowing in the next season.

      Here is what you have to do -
      1. Leave some healthy okras on the plant at the end of the summer season.
      2. Let it dry on the plant itself.
      3. Keep checking its condition, when it becomes yellowish-brown then pluck it.
      4. Keep it for drying under the sun.
      5. After drying, keep all the seeds in an airtight container or zip-lock bag for planting in the next season.

      Note : Okra seeds have a history of not storing well, so you will need to collect new seeds after each season for the next planting season.

      Monday, 21 July 2014

      How to Grow Organic Strawberries - Part 1


      Introduction

      There are mainly two types of Strawberries -

      1. Commonly Edible Strawberry - It originates from white flower and it is better in taste and nutrition. It is the commercial strawberry.
      2. Indian/Mock/False Strawberry - It originates from yellow flower. It is mostly tasteless. It is considered as a weed.

      Name : Strawberry
      Indian Name : Jharaber, Hisalu


      Other Names : Scientific names -
      1. Fragaria ananassa
      2. Duchesnea indica


      Health Benefits

      1. Boosts immunity
      2. Prevent heart disease
      3. Prevents constipation & diabetes
      4. Fight cancer
      5. Helps you lose weight
      6. Great for your bones
      7. Boosts memory
      8. To know more - Click me
      9. Other benefits - Click me


      Drawbacks

      1. Strawberries are said to contain at-least 13 pesticides, which are quite harmful for humans.
      So, it is better to grow it in your garden with organic manure.


      Strawberries of my Garden


      How to Grow

      • Planting Time : 
      1. To get the runners from the mother plant  -  Rainy Season
      2. For getting fruits  -  End of Winter

      • Note 1 : We get strawberries from the runners that grow from the mother plant.
      • Note 2 : We plant the mother plant in rainy season. It gives other small plants known as runners to us. During winter, we plant the runners to get strawberries.

      • Steps :
      During Rainy Season


      1. Get a strawberry plant from the nursery. We call it a mother plant.
      2. Take a basket.
      3. Make a bed for it.
      4. Take 2 parts of soil, 1 part of sand & 1 part of vermicompost.
      5. Mix it well.
      6. Now plant the plant in it.
      7. Pour some water on it.
      8. Leave it to get rain water & spreed it's runner.
      9. For video demonstration  - Click Me


       During Winter Season

      1. To know what to do in winter season, stay tuned.
      2. If you want to know about it now, then simply message me or drop a comment on my G+ profile.

      Thursday, 17 July 2014

      How to Grow & Care of Mint in Rainy Season


      Introduction

      Name : Mint
      Indian name : Pudina
      Other names : Scientifically known as - Mentha


      Health Benefits

      1. Relieves indigestion
      2. Helps fight oral infections
      3. Help relieve the pain associated with menstrual cramps
      4. Boosts immunity
      5. Beats stress & depression
      6. Help relieve cough & asthma helps relieve cough & asthma
      7. To know more - Click Me

      Mint of my Garden


      How to Grow

      • Planting Time : End of Winter
      • Steps :
      1. Bring a bunch of mint from the market.
      2. Take a glass of water.
      3. Dip the stem of the mint in it.
      4. Make sure that the leaves are out of water.
      5. Leave it for 1 week or till the roots have formed.
      6. Check water in between.
      7. Take a basket or sack.
      8. Fill it with 2 parts of soil, 2 parts of sand and 1 part of vermicompost.
      9. Mint grows well in sandy soil, so be careful while adding sand.
      10. Mix it well.
      11. Plant the mint in it.
      12. The whole summer you can have the healthy mint of your garden.
      13. But in rainy season you have to take care of it, for the rest of the season.
      How to Care for Mint in Rainy Season

      Click here for the video.


      1. Mint is not a rainy season plant. So, you must protect it from the rain.
      2. If a mint plant gets excess of water, then it decays & dies.
      3. So, during rainy season keep it under shade or in a shed.


      The two pictures below are of wild Mints --They can harm you.     

      Thursday, 10 July 2014

      Growing Organic Ginger


      Introduction
      Name : Ginger
      Indian name : Adrak
      Other names : Scientifically known as - Zingiber officinale


      Health Benefits
      1. Instant relief from cold and cough.
      2. Improves digestion.
      3. Tried and tested to relieve menstrual pain.
      4. Relieves headache/migraine.
      5. It is a powerful weapon against cancer.
      6. For 10 health benefits of ginger - Click Me
      7. For more uses of ginger - Click Me 
      8. Health benefits of dry ginger - Click Me
      • Tip 1 : How to make dry ginger or sonth - Click Me

      Ginger of my Garden

      Video
        
       Photos


      How to Grow
      • Planting time : End of summer. I have planted it in the end of May.
      • Steps
      1. Take a sack, roll it from top.
        Roll the sack from top.
      2. Take 2 - 3 inches of ginger which has at-least 1 or 2 eyes on it.
      3. Take 2 parts of soil, 2 parts of sand and 1 part of vermicompost.
      4. Mix them well.
      5. Take 3 parts of the above mixture and put it in the sack.
      6. Put the ginger on it, then cover the ginger with the remaining 3 parts of mixture.
      7. Sprinkle very little amount of water. Do not water it after that.
      8. Once it gets the rain water, the shoots will start coming out.
      9. For video demonstration - Click Me (I got the idea from this video)
      • Tip 2 : Ginger grows in sandy soil, so be careful when you are making the bed for it.
      • Tip 3 : Ginger plants need soil on top, so keep adding soil, sand and vermicompost from time to time. And each time you add the mixture keep rolling the sides of the sack upwards.
      • Tip 4 : Be sure that the ginger rhizome is not exposed to the sunlight. If it is exposed to the sunlight then it will turn green and green gingers are not good for health.
      • Tip 5 : Make sure that water doesn't collect in the sack. It should be drained out.
      • Tip 6 : After 3 months of planting the ginger, you can take out the full grown ginger and you can start using it in food.
      • Tip 7 : You can leave the ginger rhizome with smaller shoots in the soil till the end of winter. After that you will have to take them all out and store them. 
      • Tip 8 : If you want to use these ginger for planting in next season, you can store them in dry soil containing sand in a dark place.

      How to Store Ginger
      1. Method 1 : Store them as sonth.
      2. Method 2 : Store them in fridge or freezer. For demonstration - Click Me


      Tuesday, 8 July 2014

      Holy Medicinal Plant - BASIL


      Introduction 


      Name : Basil
      Indian name :Tulsi
      Other names : Scientifically know as - Ocimum basilicum

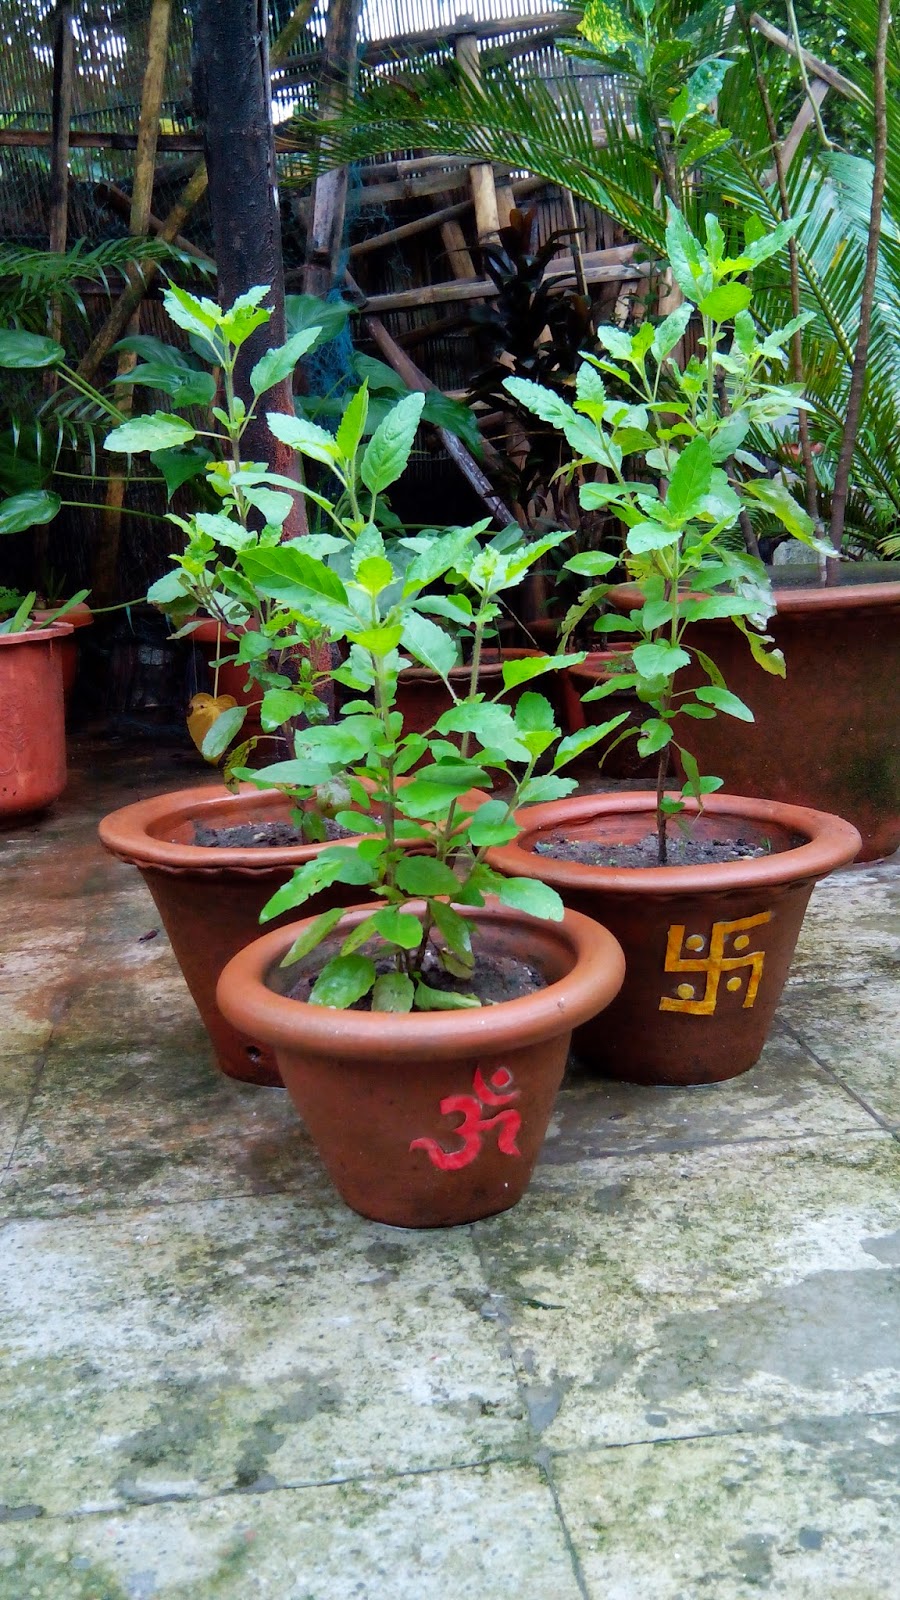
      Basil is a holy plant. It has a lot of medicinal value. One can easily grow in a pot & on the terrace. Rainy season is the right time to plant a Basil sapling. It is an annual plant. It can not survive in extreme cold weather.

      Health Benefits 

      1. It is a tonic to calm the nervous system. 
      2. It helps in digestion & also ease stomach cramps.
      3. It contains vitamin A, K & C. It also contains magnesium & calcium.
      4. It is rich in antioxidant.
      5. For detailed information please refer to - Click me
      6. Curative uses of Basil


        Basil of My Garden


        How To Grow

        Planting Time : It grows in summer season but it is planted in the end of winter season.
        Note 1 : You can grow Basil with the help of seeds. It is easy to grow a sapling out of the seeds. Here is a tip for you - 

        Tips : Collect seeds of Basil in winter from a full grown healthy Basil plant. Dry it and store it in a airtight container.  
      1. Take an earthen pot.
      2. Fill it with three parts of soil, one part of sand & one part of vermicompost.
      3. Put the seeds in it.
      4. Cover the seeds. Sprinkle little soil on it.
      5. Sprinkle little water on it.
      6. Put the pot under the sunlight.
      7. Don't pour water on it until the sapling comes out.
      8. For pictorial demonstration - Click here
      9. Have a look It will make you happy.
      • Note 2 : Grow your own plant. Don't purchase chemically preserved basil products.
      • Note 5 : Anything in excess is bad so eat only 2 leaves of basil a day from your own home grown plant.
      • Note 6 : Use vermicompost beacuse : - Basil is one of the twelve plants in which residue of pesticide is very high. Click here for details
      • Note 7 : Side effects of basil -Active Ingredient - Eugenol is the primary oil in holy basil. It is sometimes called clove oil because it is also the active ingredient in cloves. Eugenol is known for its antiseptic and analgesic properties and is often used by dentists to make temporary fillings. 

        Eugenol Side Effects - Eugenol overdose can occur if too much is ingested. Symptoms of overdose include shallow breathing, blood in the urine or sputum, mouth and throat burns, nausea, racing heartbeat, seizures, dizziness and coma. You should contact a doctor or poison control center immediately if any of these symptoms occur. Click here for details

      Sunday, 22 June 2014

      Growing an Organic Bitter-Gourd

      Introduction 

      Name : Bitter-Gourd
      Indian name : Karela
      Other names : Bitter-Melon, Balsam Pear, Bitter-Squash
      Bitter-gourd is a tropical climber vegetable.

      Health Benefits

      1. It is a common remedy for diabetes.
      2. It is useful in cases of spleen and liver diseases.
      3. It is supposed to purify blood.

      For detailed information please refer toClick Me

      Bitter-Gourd of my Garden

      For video of my garden's bitter-gourd and cucumber - Click Me

      How To Grow

      Planting Time : End of winter season (I planted it in March)
      Note 1 : You have to grow bitter-gourd with the help of seeds because the saplings of bitter-gourd is quiet difficult to find. It is difficult to grow a sapling out of the seeds so here is a tip for you - 
      • Soak the seeds for 24 hours in warm water.
      OR
       Note 2 : If you want to disinfect the seeds then for 50 gm of seeds -
      1. Take a utensil
      2. Put 1 small cup (100 ml) warm water in it.
      3. Put 50 gm seeds into it. Shake it. (Take out those seeds which did not sink and throw them out of the utensil.)
      4. Put 5 gm vermi-compost into it. It provides minerals to the seeds.
      5. Put 5 gm jaggery into it. It provides nourishment to the seeds.
      6. Put 5 ml cow urine. It disinfects the seeds. You can get cow urine from ayurvedic medical stores.
      7. Mix it well and keep it for 24 hours in shade.
      8. Take it out and strain it through a muslin cloth and tie the seeds in it very carefully.
      9. Keep it wrapped in a jute sack or hay for 48 hours. 
      10. Now it is ready for planting. 
      • I got this information fromClick Me
      Tips :  Here are the steps to plant the bitter-gourd on the terrace/pot.
      1. Prepare a bed for it; take a 10 kg empty wheat packet or a plastic sack.
      2. Fill the sack / wheat packet with three parts of soil, one part of sand and one part of half/fully decayed kitchen waste.
      3. Mix them well.
      4. Take out the soaked seeds and sow them in the soil, not too much inside the soil.
      5. Sow the seed just half inch deep from the top.
      6. You can sow three seeds in one container, not more than that.
      7. Pour little water on it.
      8. After that never pour water on it till the saplings comes out.
      9. If the plastic polythene bag is thick then make many holes at the bottom for the drainage of excess water.
      10. If you are taking a plastic sack then there is no need to make holes in it.
       Note 3 It is very important not to water a bitter gourd seed until the sapling comes out.
      • Once the sapling comes out you can give some water daily, or on every alternate day.
      • Make sure the water is not getting stored in the sack/plastic bag. It should be drained.
      • Sapling will start coming within one week. It would come earlier if you have disinfected the seeds.
      • It will start giving flowers after one and a half months. And then you can enjoy home-grown, organic bitter-gourd which is a boon for the diabetic people.